QuickBooks for Mac Company Setup
- Setting up a new company in QuickBooks for Windows: Pro, Premier
- Setting up a new company in QuickBooks Online
How to setup a new company in QuickBooks for Mac
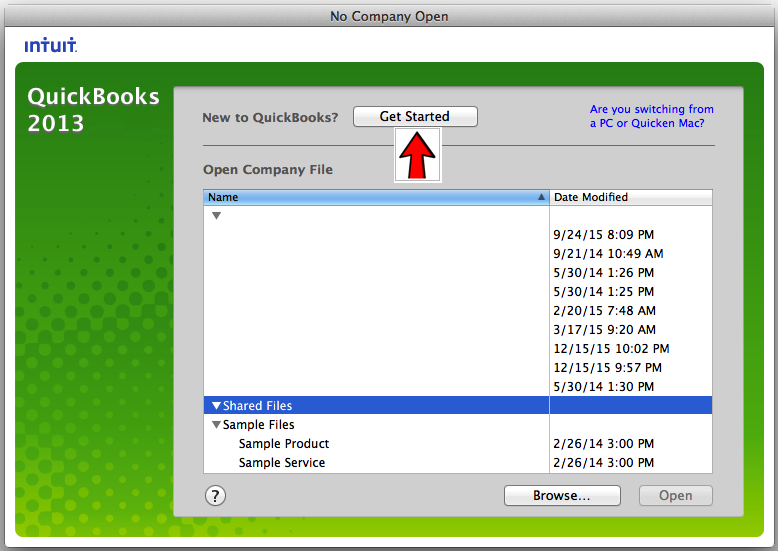
Step 1. Click on the Get started button as shown in snapshot below at red arrow.
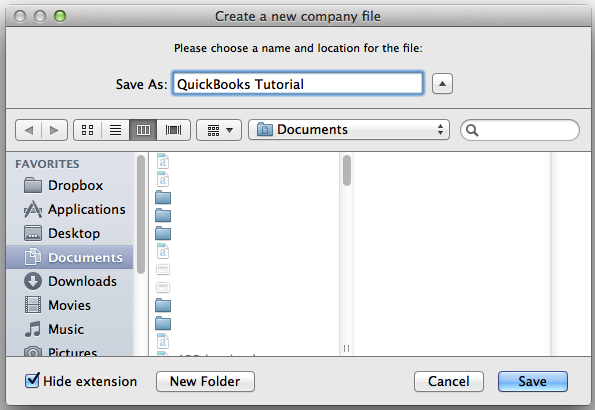
Step 2. Enter your company name at the Save As button as shown in snapshot below, and the location you wan tto save your company file to. Click Save. (Your company file will then be saved, and your company name forwarded to the next screen where you will enter your other important company information.)
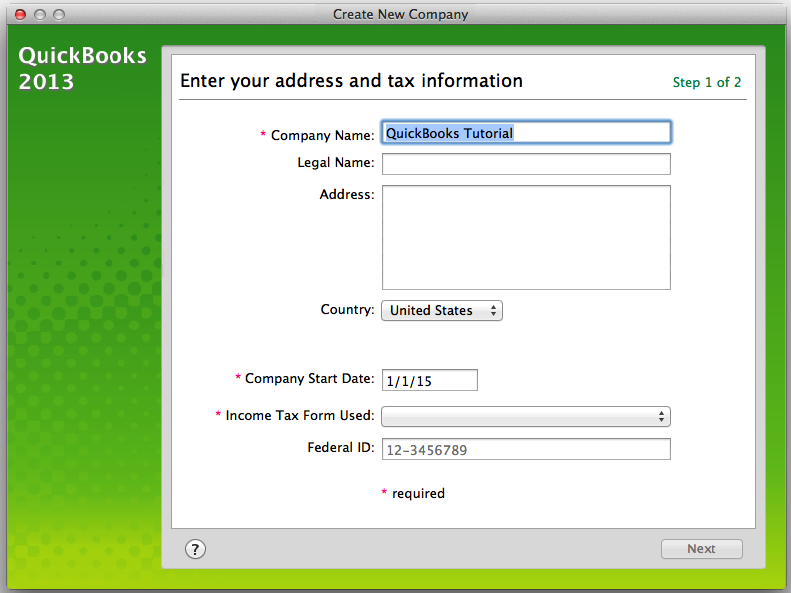
Step 3. Now that your company name is transferred to the new window as shown in the snapshot below, complete the other information - company address, company start date, Income tax form used, etc, and click Next. (You will be able to edit this information later, but the fields with asterisks are required in order to continue with the setup.)
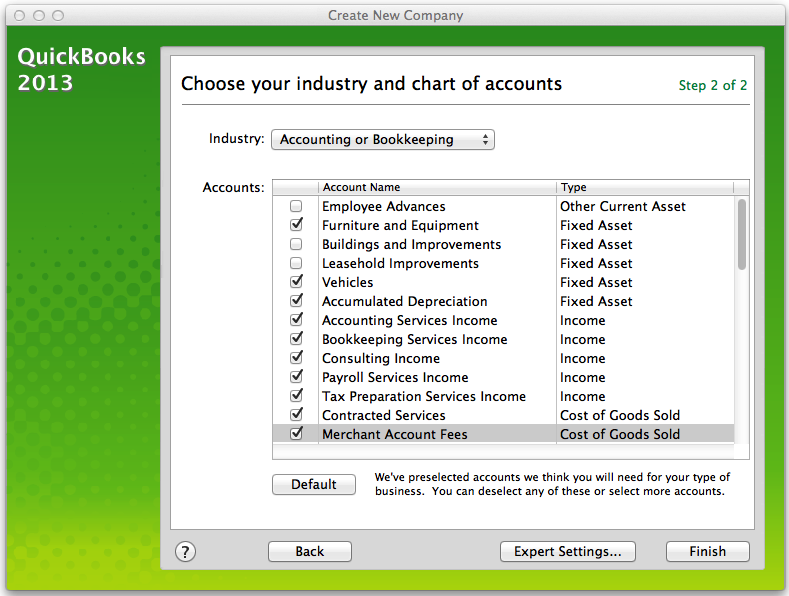
Step 4. Choose your industry type as shown in screen below. Custom checkmarks will be allocated based on your industry type; you can check and uncheck to suit your business needs or leave as is to customize later. Click Finish.
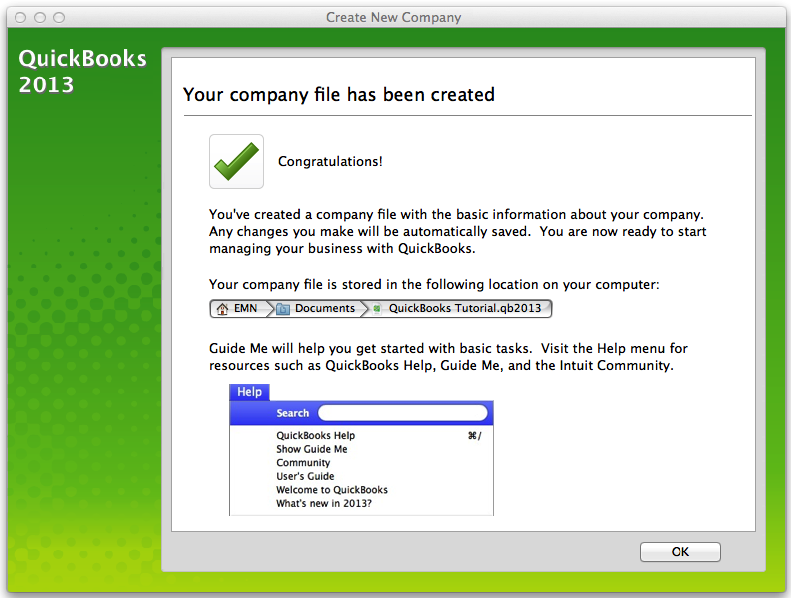
Step 5. Click Ok as shown in snapshot below.
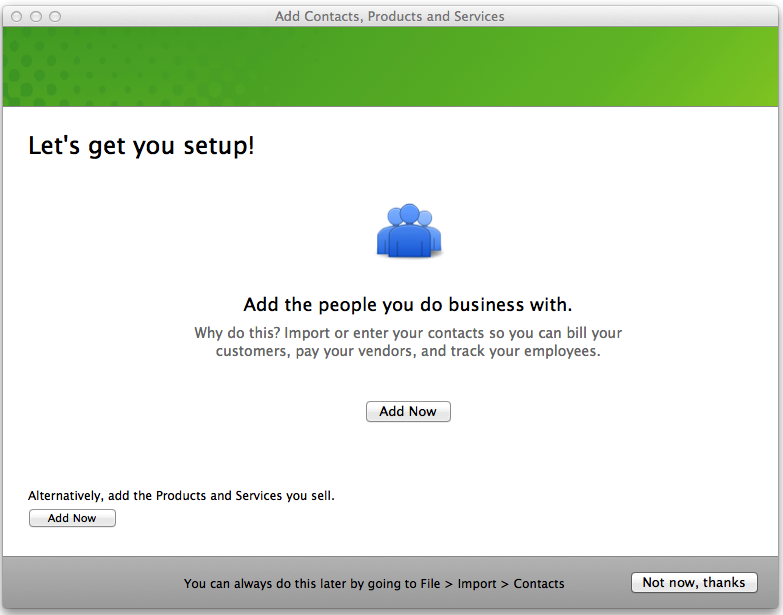
Step 6. In this next snapshot, you can choose to add the people you do business with by clicking the Add Now button or Not now, thanks to add your customers, vendors, etc later. (This will take you to the new company home page.)
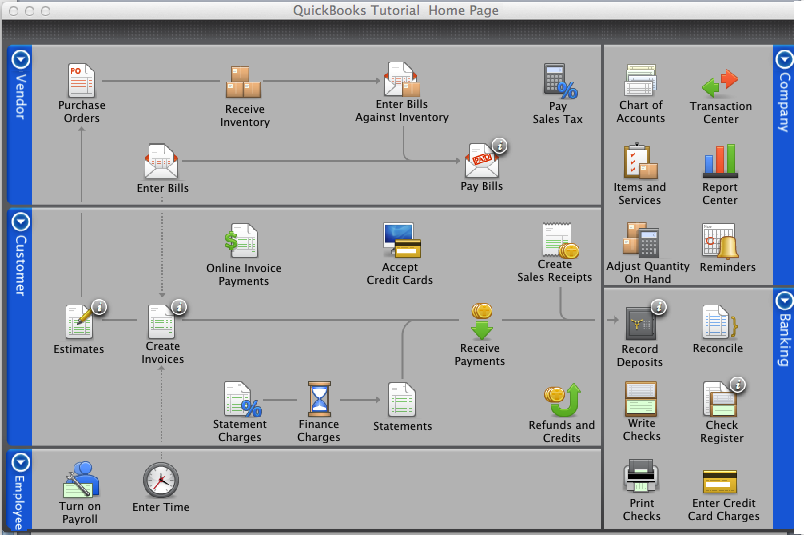
Step 7. Here in your new company homepage as shown in the snapshot below, you can start working in your company, and customizing as the need arise. You may visit the QuickBooks for Mac page and scroll down for additional info. or the Frequently Asked Questions page for help moving forward.


.png)
